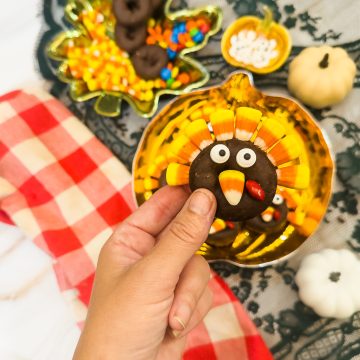
Whether you’re planning a Disney birthday party, a movie night, or just want to add some magic to your day, these Mickey Mouse Cookies are the perfect treat. They’re super simple to make, no baking required, and they always get a big smile—because who doesn’t love Mickey?
These cookies are made with Oreos, chocolate wafers, and a few candy melts. That’s it! So you can put them together fast and still feel like you did something fun and creative. And yes—kids can absolutely help make them!
We are sharing tips to help you get the best results when making this recipe. If you don’t need the tips, scroll to the bottom for the full recipe and printable recipe card.
⭐ Why You’ll Love Mickey Mouse Cookies ⭐
They’re no-bake and super easy. No oven needed—just melt, dip, and decorate.
Perfect for parties. These cookies are always a hit at birthday parties, Disney movie nights, or school events.
They’re just so cute. Seriously, who can resist a cookie that looks like Mickey Mouse?
Fun for kids to help make. Get the kids involved—they’ll love dipping and decorating!
Tastes amazing. Crunchy Oreos, smooth chocolate, and sweet candy melts? Yes, please.
Customizable. Change up the colors or candy buttons to match any party theme or holiday.
Whether you’re a lifelong Disney fan or just love adorable treats, these Mickey Mouse Cookies bring the fun and the flavor in every bite!
🧾 Ingredients
📌 Be sure to see the recipe card below for the full ingredients list with quantities and step-by-step instructions!
- Double Stuf Oreos (regular Oreos won’t hold the ears as well)
- Chocolate melting wafers (like Ghirardelli or Wilton)
- Red candy melts
- Yellow M&M’s or similar small yellow candies
- Toothpicks
- Wax paper
- Baking sheet
- Two small saucepans (for melting)
Tip: Buy extra Oreos—you’ll probably want to snack while making these.
🔪 How to Make Mickey Mouse Cookies
These come together in just a few steps, and once you get the hang of it, it moves fast!
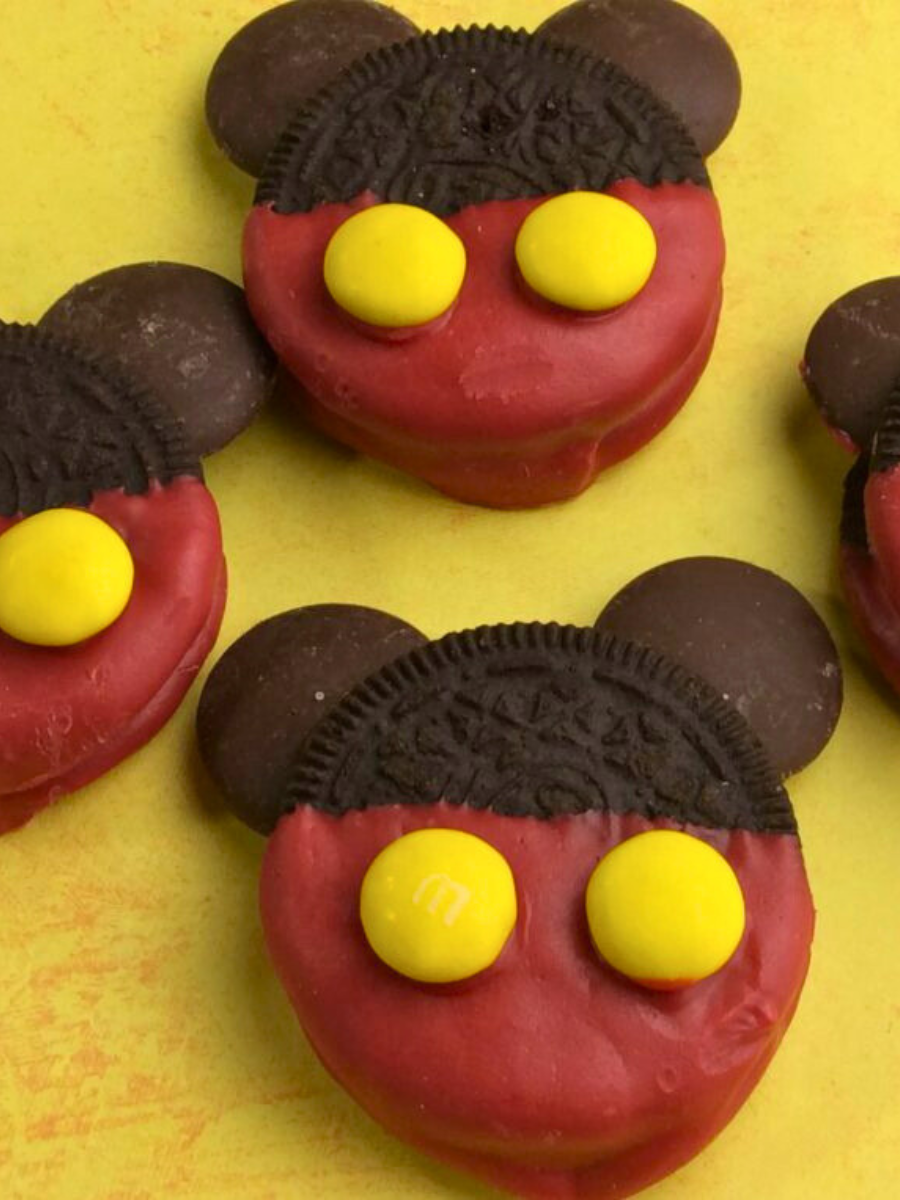
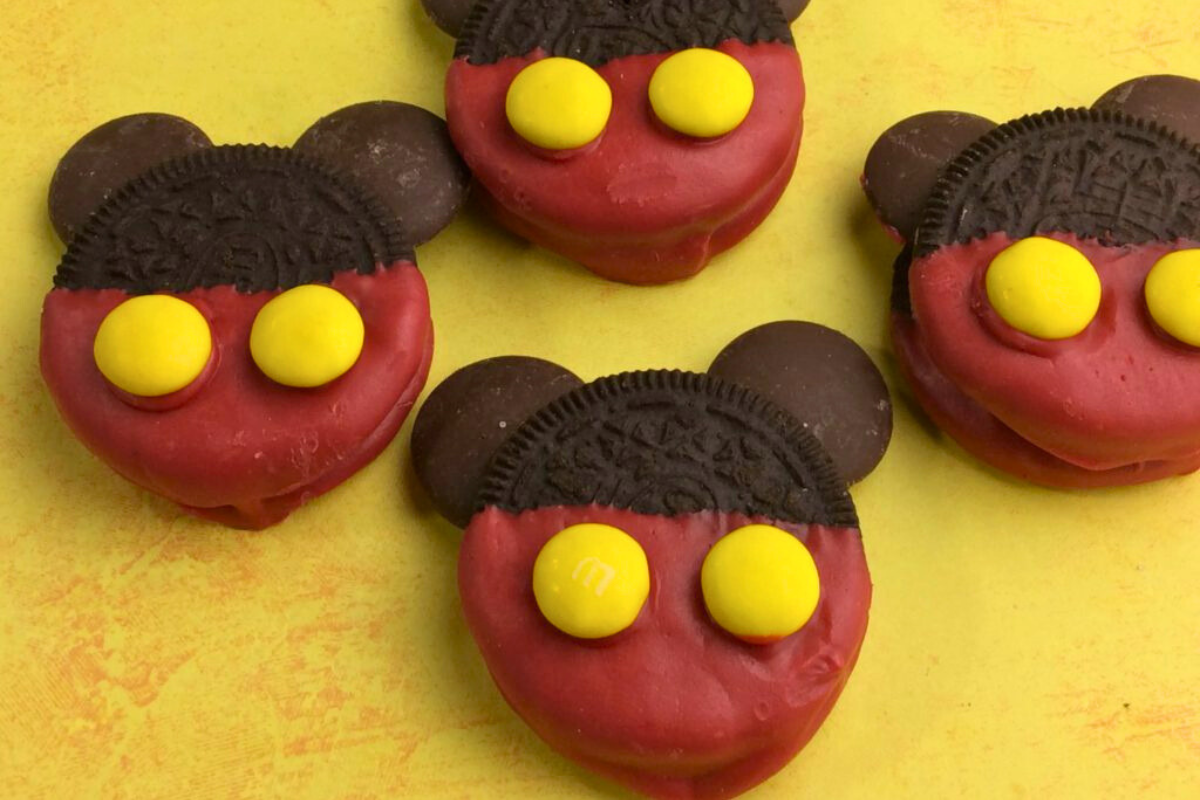
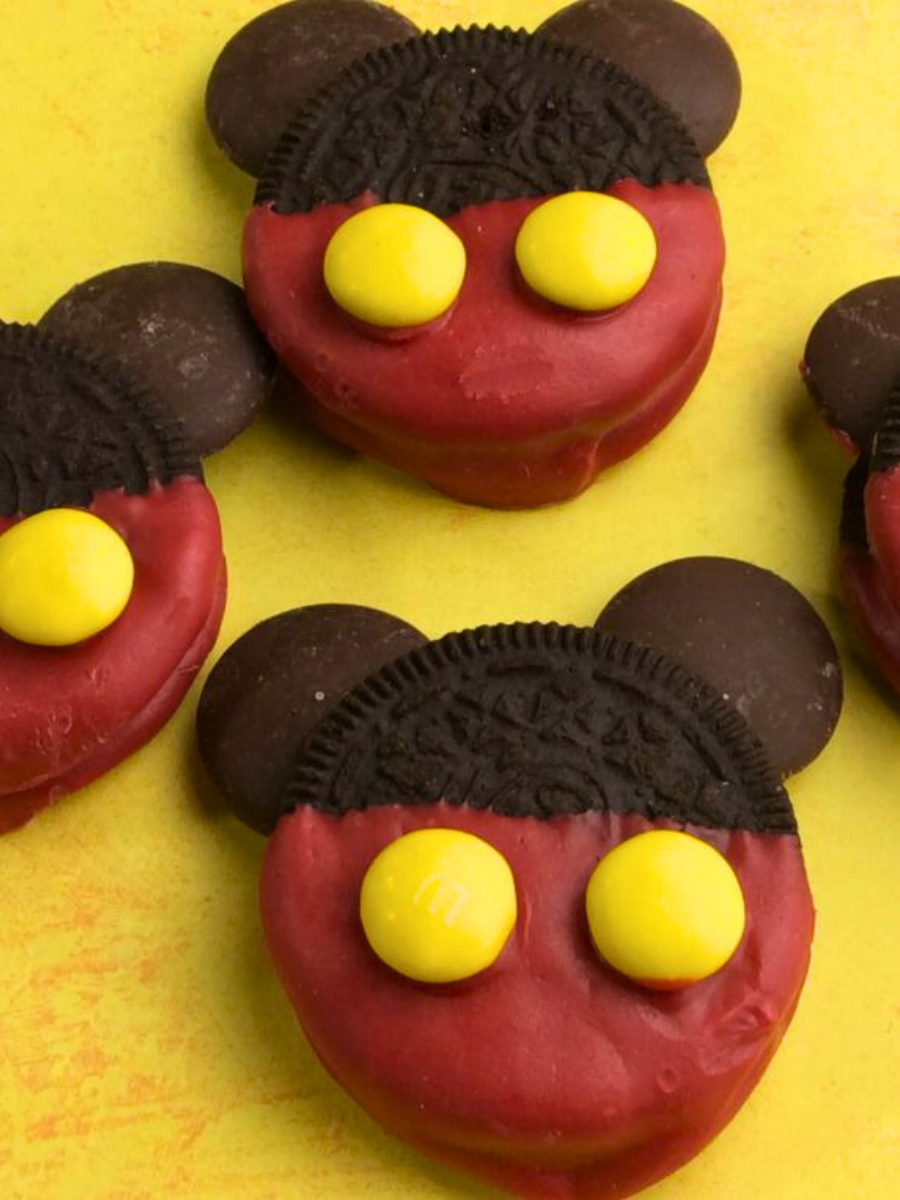
- Twist open the Oreos gently so the cream stays on one side. Lay them on a wax-paper-lined baking sheet.
- Melt the chocolate wafers using a double boiler method (place a small saucepan over a pot of simmering water).
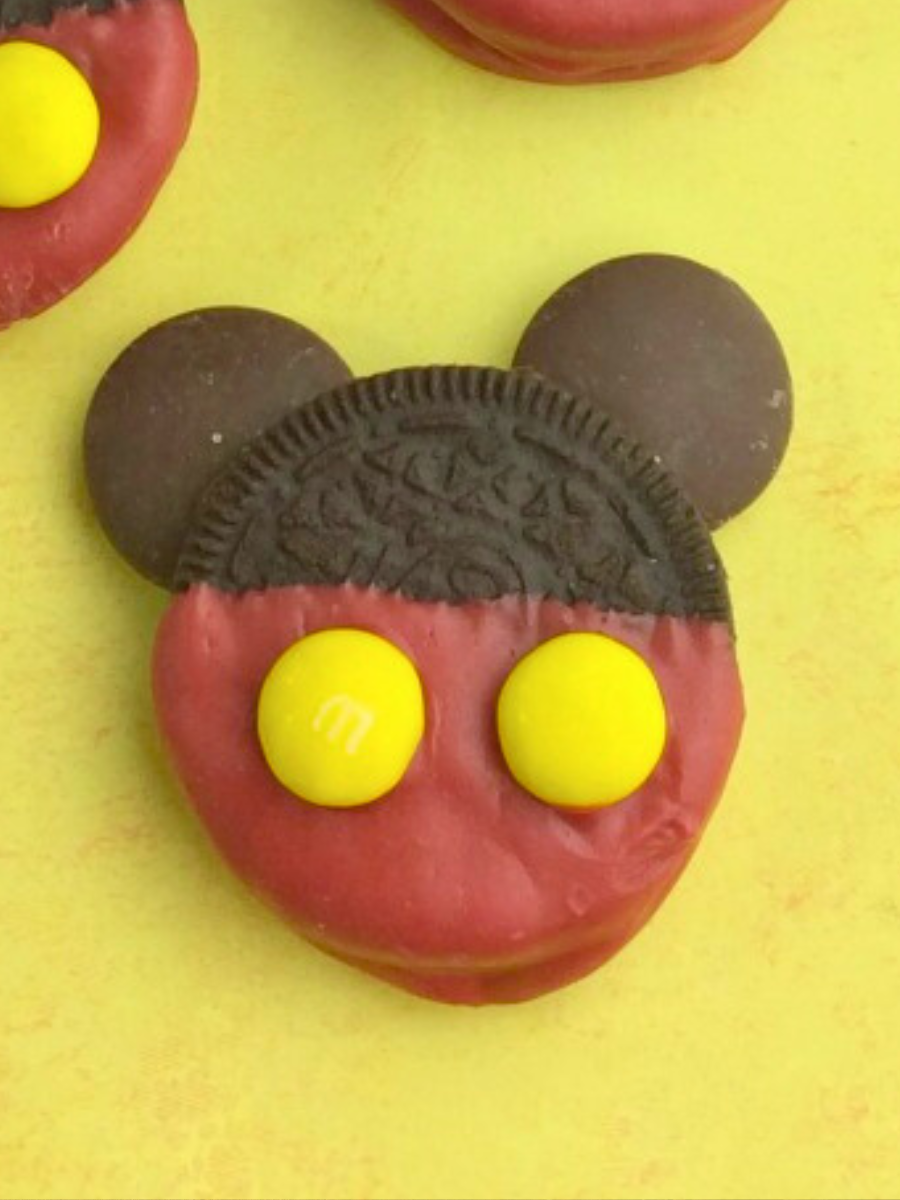
- Dip the edge of a chocolate wafer in the melted chocolate and press it gently into the cream side of the Oreo to form an ear. Repeat with a second wafer to make both ears.
- Let the chocolate set a few minutes so the ears don’t fall off when you move the cookie.
- Melt the red candy melts the same way.
- Dip the bottom half of each cookie into the red candy to give Mickey his signature red shorts.
- Place two yellow M&Ms on the red part of the cookie for the buttons. Do this quickly before the candy sets!
- Let the cookies cool completely. You can speed things up by popping them in the fridge for about 15–20 minutes.
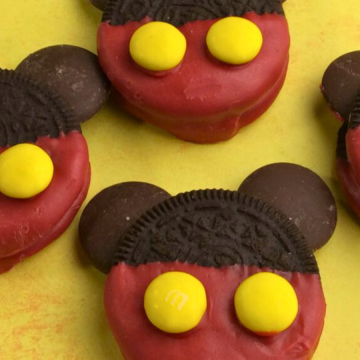
And that’s it! You’ve got the cutest Mickey Mouse Cookies ever!
⭐ Pro Tips ⭐
- Be gentle when twisting the Oreos open—some will break, and that’s okay (more for snacking!).
- Don’t overheat the candy melts or they’ll seize. Low and slow is best.
- Use a toothpick to help spread the melted chocolate or candy if it starts to set too fast.
📖 Variations
Use mini Oreos and mini wafers for a bite-size version.
Swap the red candy melts for blue or green to make themed Mickeys for holidays.
Try white chocolate for a snowy winter Mickey.

More Delicious Recipes To Try


Mickey Mouse Cookies
Equipment
- wax paper
- Cookie sheet
- two small pots
- tooth picks
Ingredients
- 1 package Double Stuffed Oreos
- 1 bag chocolate melting wafers
- 1 bag red candy melts
- 50 yellow M&M's or about 1 cup
Directions
- Gently tear apart the Oreo cookies so that you have one half clean of filling and the filling is on the other half.
- Fill 1/4 of the bottom pot with water and place on medium heat.
- Place the second pot on top for a few minutes to get hot.
- Take one of the chocolate wafers and use your fingers to place the bottom edge of the wafer to the bottom of the top pot to “Melt” the wafer to the edge of the cookie
- Place the melted edge of the wafer to the edge of the filling to make the wafers look like ears.
- Repeat steps with all filling halves of the cookies.
- Pour in the red candy melts into the same top pot and using a spoon, mix until melted.
- Using a tooth pick, once the red is melted, dip the toothpick into the candy melt and then drop some of the candy melt onto the edge of the chocolate wafer and filling to create a “glue”.
- Place the none filling half of the cookie on top of the filling half so that the “glue” will cool onto the other half and hold the cookie in place.
- Dip the cookies half way into the red candy melt and then place on the wax paper.

Leave a Reply