This post contains affiliate links. If you buy something from them, I earn a small percentage that helps keep The Spring Mount 6 Pack running.
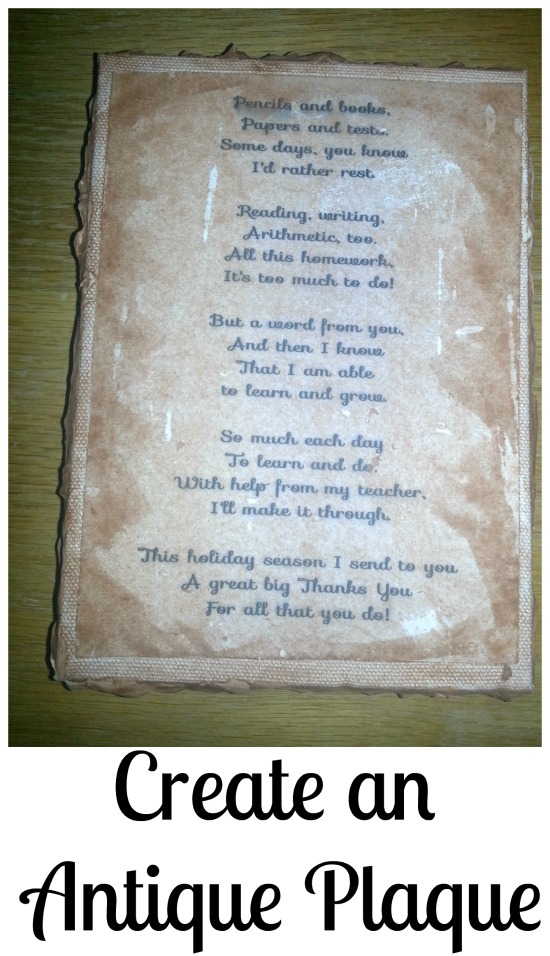
Make an antique plaque- Perfect for a gift or decorative art
If you want to make a great personalized gift that looks like something you would have bought in a gift store, then this is a great craft to start. It takes simple supplies.
What you need:
A Canvas
A Printer and paper
A saying, poem or picture you like
and brown pain and foam paint brush
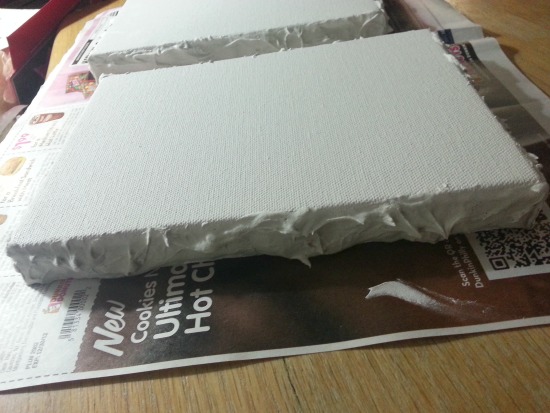
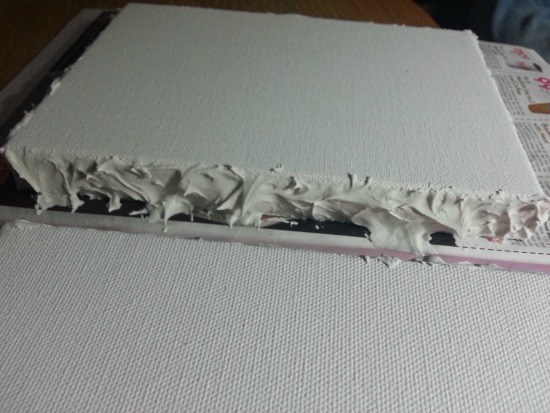
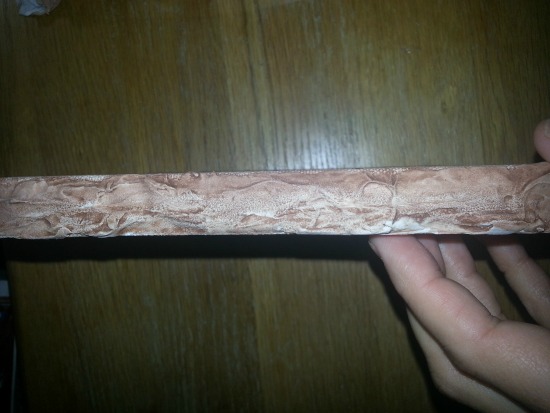
Start by putting spackle on all of the sides of the canvas. You want it to be bumpy. It is to make it look almost like carved stone. Let it dry. It can take a little while to dry, depending on how much is on it.
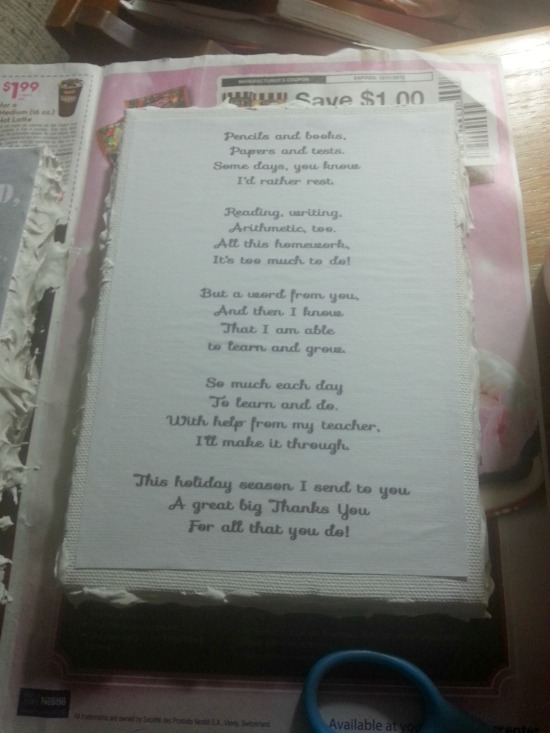
Glue the paper to the top of the canvas. Depending on the size of the canvas and the paper, be sure to trim the paper down.
Take the brown paint and water it down. It needs to be a water-y solution. It is making a stain,
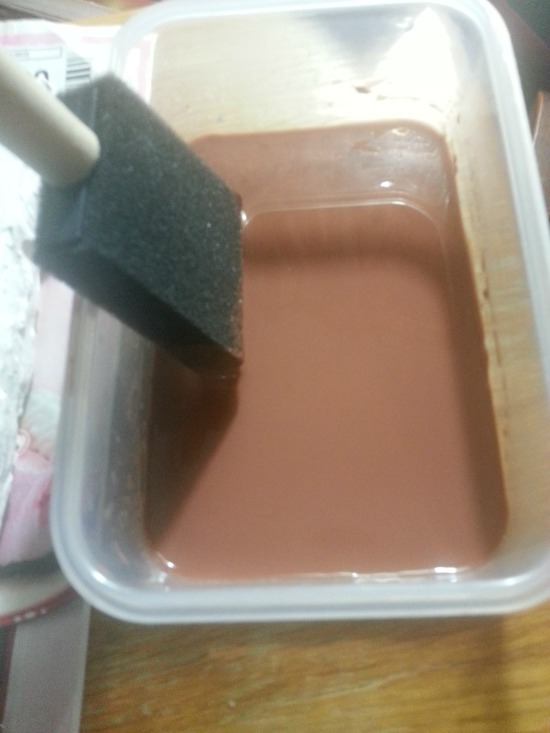
Start by staining the sides. Get it into the creases. Some places will be light and some will be darker. This will bring out the texture.
Then do a thin coating over the top of the paper. DO not put on too much or it will make it too dark to read. It can also tear the paper. Also, be cause because it can cause the words to smear if you are too rough or use too much.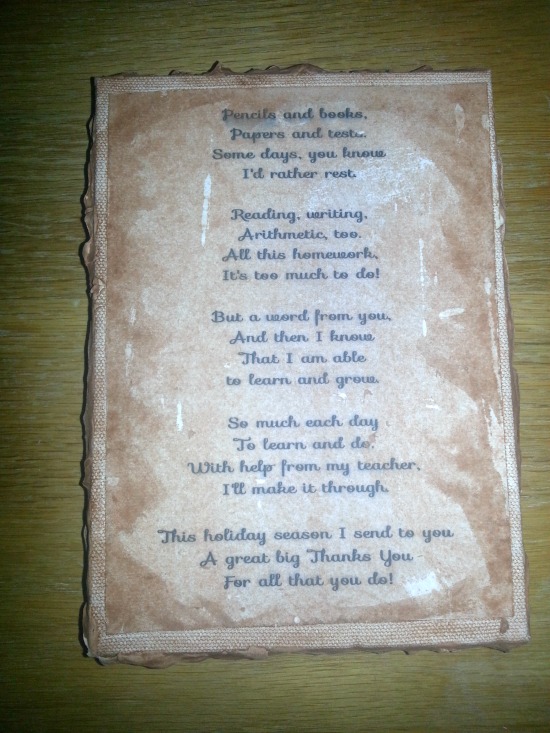 Then just let it dry. You can see the paper is a bit smaller than the canvas on mine. It is not a big deal if it is. But if you want a more uniformed look, have paper go to the edges.


shelly peterson
This is really a neat idea! I love it! My Mom would like something like this.
Sandra VanHoey
This is so awesome and yours turned out beautiful. I might add, I am not at all crafty but would really like to try this one day soon. What a great gift this would make
Robin (Masshole Mommy)
I love the way it came out. What a great way to make something that was a little plain and give it a unique look.
Elizabeth Towns
I like the idea of antiquing this wall hanging. I wonder how much it would change the look of it if you mixed a little gold into the brown paint before you got started with the process. I may try that out and see what happens. This is a great project.
Jessica Beal Harlow
This really came out well! It’s not easy to make things look antique! It would make for a coveted gift!
brett
very cool idea. and stuff we have around the house already!
Jennifer B
This is just so pretty and would make a wonderful gift idea!
Jenny
Great idea for a craft project, although might be too messy for me unless I do it out in the garage lol
Dawn Lopez
Wow, what a wonderful idea! You are so clever! I always want to try things like this and never get to them. I am so going to need to do this one, it’s a winner! Thanks for sharing!
KatyRose
What a simple and creative craft. I can see this being a great way to add art to any room in the house, or even commemorate a child’s poem or writing. – Katy
Lexie Lane
This is definitely a perfect gift! Plus I love anything on canvas. or anything personalized.
Debbie L.
Cute project! Your’s really looks nice!
Jessica Lieb (@bkeepsushonest)
That looks so great. What a clever idea.
Laurie - Steals and Deals for Kids
What an awesome idea!! I can’t wait to try this!! It sounds like it would be a great art project at school, too!
Debbie Denny
That is beautiful!. Love the look.
Pam
How cool! This looks like something my dad would love to have hanging in his house. It would be a great gift.
Shauna
That is such a great and creative idea. I would love to do something like this for my little sister for her wedding. Thanks so much…
Trisha Grimes
This is so cool and I love how yours came out! Thanks for the tutorial!
Sandra
I wish you just lived near me so that you could make it for me. Love it.
Amanda
This came out great! I’m sure you could make a lot of gifts using these steps!
Tess
Thame out so well.I dont think I could ake it loo so good.
Aly Mashrah
That looks so cool! I’d love to make one of these sometime.
Lisa Jones
This Is A Great Idea Would Love To Make So Sharp Looking!!
Mama to 5 BLessings
wow that turned out great, looks really old – great job!
Liz Mays
That’s pretty easy to do that, and I really love how it turned out. The stain worked great!
Janeane Davis
I like this way of making a beautiful, treasured item.
Trice
This would be a cute end of the year gift for my kids teacher. Thanks for the ideal.
Amanda A
What a cute idea. I could see this being something fun for kids to do to!
Rosie
Wow, amazing tutorial! So creative…thanks!
Annie {Stowed Stuff}
Wow, so amazing how great it came out. I think I might even be able to do that! Thanks!
Rosie
This is great gift idea, thoughtful and not too expensive, and one that would have the recipient feel special! It came out nice!