Making your own Greek Yogurt in the Instant Pot is easier than you think. Once you’ve made a couple of batches of this delicious, creamy, and smooth Greek Style yogurt, you’ll never want to buy the store-bought varieties again. The great thing about making homemade yogurt is that you can make it whenever you want it.

How to Make Homemade Greek Yogurt
Believe me when I saw that once you start making your own yogurt at home, you will wonder why it took you so long to start.
I love using Greek yogurt when I am cooking and baking as well. It’s lighter in calories and it adds such a fantastic flavor to your recipes.
I have a few recipes that I think your family will absolutely love that uses Greek yogurt. One of our fabulous favorites, as well as reader favorites, is my 2-Ingredient Dough! This recipe literally uses two ingredients to make this dough! It’s such a versatile recipe. Add in the fact that it’s so easy, you will be making it time and time again. Here are a few recipes that use this dough that I think you will absolutely love.
Recipes using Greek Yogurt
- Weight Watchers Pepperoni Pizza (even if you aren’t on WW, this is a great pizza recipe)
- 2-Ingredient Dough Breadsticks
- Healthy Broccoli Cheddar Chicken Pockets
- Homemade Pop Tarts
- Healthy Apple Pie
How Many Weight Watchers and Itrackbites in Greek Yogurt
Greek yogurt is a stable on Weight Watchers and Itrackbites. Tha tis because it is low in points, free on many plans and it is low in calories. Since you are using fat free milk it is also fat free. I use Fat Free Greek yogurt in a lot of my favorite recipes. It is a great substitute for sour cream and mayo.
| Weight Watchers Plans | Points |
| Purple | 0 |
| Blue | 0 |
| Green | 3 |
| ItrackBites Plans | Bites |
| Better Balance | 0 |
| Carb Conscious | coming soon |
| Sugar Smart | 3 |
| Calorie Command | coming soon |
| Keeping Keto | coming soon |
| Conquer Cravings | coming soon |
Have you joined our Weight Watchers Facebook Group? Free recipes and support. Perfect for everyone!
Want to Weight Watchers for almost free? Get a Year’s Membership for the Price of a Month – Learn More About Healthi – Use Code Coach_DebiMurray to save
Save Money on Weight Watchers. One Year on iTrackBites for about the cost of 1 month on Weight Watchers. All the same plans and points. Use code
Code_DebiMurray to save
FAQ About This Recipe
How long does it take to make Homemade Yogurt
What is the difference between Greek yogurt and regular yogurt?
Can you freeze homemade yogurt?
Instagram is one of my favorite places to be. Join us as we share our Perfectly Imperfect Life with recipes, crafts, parenting, and fun! Be sure to check out our stories for real-time fun!
Ingredients Needed
Note: You can use any plain, non-flavored yogurt with active cultures in place of the packaged yogurt starter used here. You can also save some of each batch you make to use as starter for future batches. Simply freeze in ice cube trays, and then thaw completely when ready to make another batch.
You will find a complete list of all of the ingredients that you need as well as the directions on the printable recipe card below.
- Fat free milk – using fat free milk is the best choice when making yogurt.
- Yogurt starter – refer to the note above about the starter.
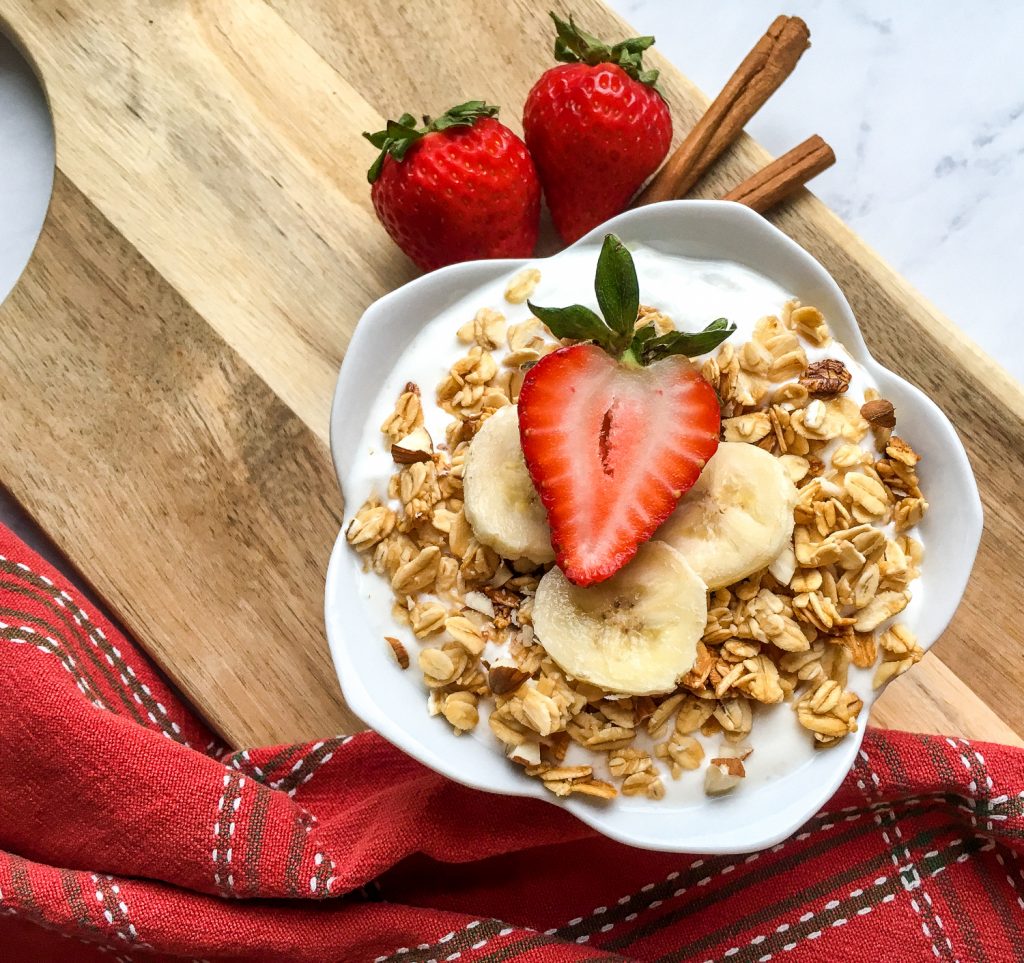
- Fresh fruit – this is optional but adds a lot of color and fun to the yogurt.
- Granola – adding granola provides a fantastic texture to this recipe.
How to Make Homemade Greek Yogurt
Below is a brief breakdown of the steps below. To get the full steps, refer to the printable recipe card at the bottom of the post.
Step 1: Add the milk into the Instant Pot® then select the function button that says, “Yogurt”. Then press “Adjust” until you see the screen say, “boiL”.
Step 2: Add the lid and then wait until you hear the unit beeping to indicate that it’s done boiling. You will see the screen say, “YoGt” when it is done.
Step 3:Insert the thermometer into the milk to make sure that it’s reached at least a minimum of 180 degrees.
Step 4: Turn the Instant Pot off and let the milk cool.
Step 5: When the thermometer reads 110 F degrees, it is cool enough to add the yogurt starter.
Step 6: Return the pot to the unit and cover with the lid. Select the “Yogurt” function and make sure the setting is on “Normal”. You do not want it on “low”. Set the timer for 8 to 10 HOURS.
Step 7: As soon as the yogurt has finished incubating, remove the lid and turn it off. Line a strainer with cheesecloth and place it over a large bowl. Pour the yogurt into the strainer and then place it into the fridge for several hours up to overnight.
Step 8: Once it’s thoroughly strained, discard the liquid whey and transfer the yogurt into a bowl.
Step 9: Serve right away and top with the toppings you prefer.
Step 10: Enjoy!
Related Recipes
Weight Watchers Chocolate Mousse

Homemade Greek Yogurt
Equipment
- Pressure cooker with ‘Yogurt’ function
- Yogurt Starter – either plain yogurt with active cultures or yogurt starter
- Instant Read Digital thermometer
- Cheesecloth
Ingredients
- 1/2 gallon fat free milk
- 2 packets yogurt starter
- Fresh berries
- Bananas
- Granola
Directions
- Add milk to Instant Pot® and select the ‘Yogurt’ function. Select ‘Adjust’ until the screen says ‘boiL.”
- Add lid and wait until the unit beeps to indicate it is finished boiling. The screen will say “YoGt” when done. Insert instant read thermometer into the milk to ensure it has reached at least 180°F
- Turn unit off and remove pot to allow milk to cool. For quicker results, place pot in a tub of cold water or leave on the counter to cool naturally.
- When an instant read thermometer reads 110°F, the milk is cool enough to add the yogurt starter. For best results, remove about a cup of the milk from the pot and stir the starter into that before pouring into the rest of milk in the pot.
- Return pot to unit and cover with the lid (no need to seal for this function). Select the ‘Yogurt’ function again and make sure the setting is on “Normal’ (NOT “Low” – very important!) and adjust time for 8-10 hours. The longer the incubation period, the tangier the yogurt will be.
- When the yogurt is done incubating, remove the lid and turn unit off. Line a strainer with some cheesecloth and place over a large bowl. Pour yogurt into the strainer and place in the refrigerator to strain for several hours to overnight. The longer the yogurt is allowed to strain, the thicker the yogurt will be.
- Once yogurt is strained, discard the liquid whey (or save to use in smoothies) and transfer the yogurt to a bowl. If the yogurt texture is lumpy, process with an immersion blender or hand mixer until creamy and smooth.
- Serve immediately topped with fresh fruit, granola, and a drizzle of honey, if desired, or store in an airtight container in the refrigerator for several days. Enjoy!


Leave a Reply