
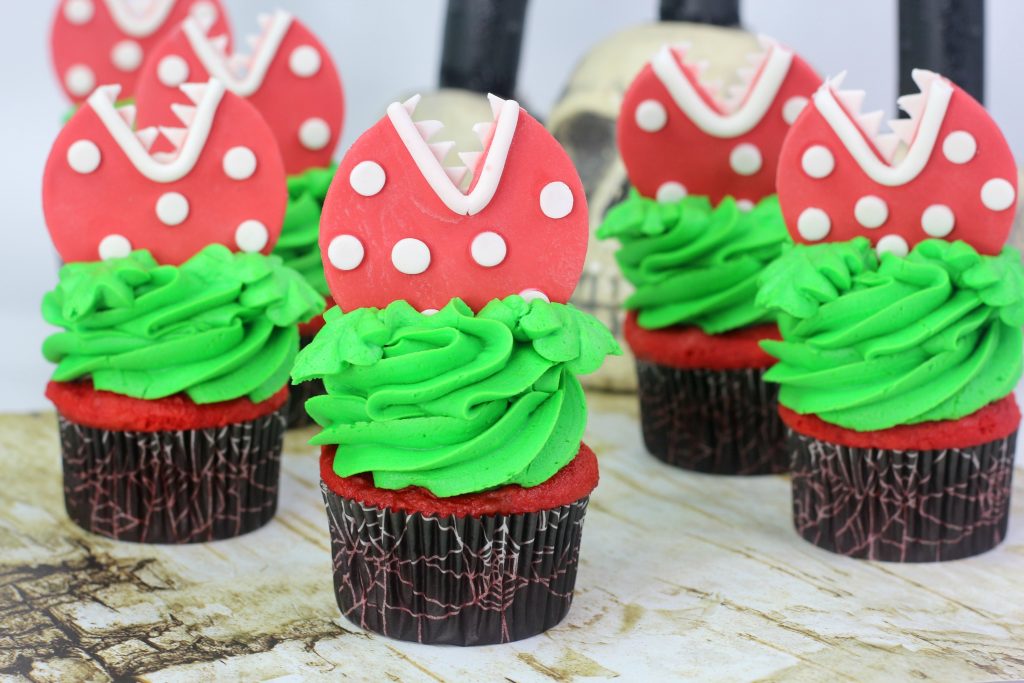
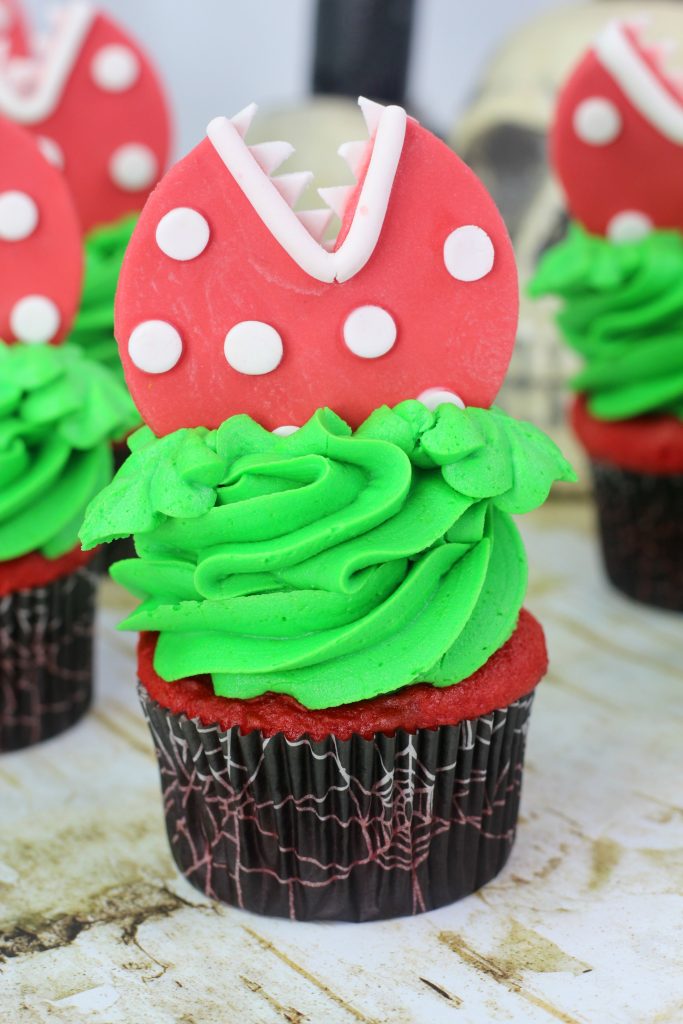
These Audrey II cupcakes are such a fun Halloween treat! Moist red velvet cupcakes are covered with smooth buttercream and topped with little fondant Venus flytrap faces inspired by Audrey II from Little Shop of Horrors.
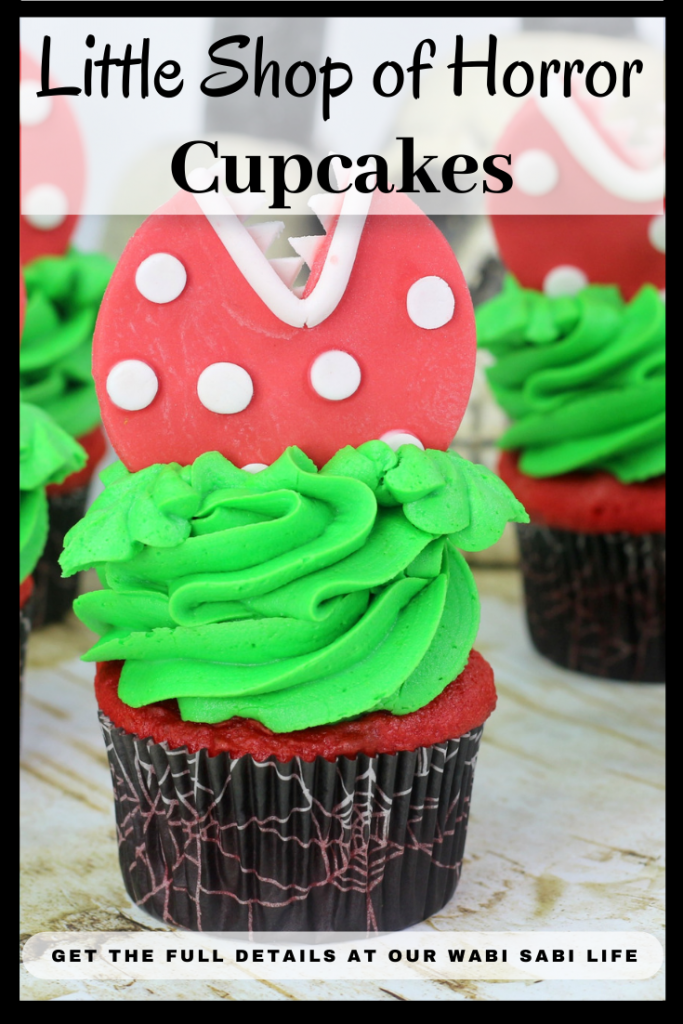
They are perfect for a Halloween party, movie night, or any fan of the musical. The red velvet cupcake makes a pretty red base, while the green frosting and silly teeth give each cupcake a spooky, playful look. Kids and adults are both going to love them!
Why You’ll Love These Cupcakes
- They start with an easy boxed red velvet cake mix.
- The fondant decorations can be made ahead of time.
- Each cupcake looks like a tiny Audrey II plant.
- They are fun for Halloween parties and Little Shop of Horrors gatherings.
- You can use the same decorating idea for a larger Little Shop of Horrors cake.
Red Velvet or Chocolate Cupcakes?
Red velvet cupcakes are a great choice when you want the red color to show through the open mouth decoration. They also pair well with vanilla buttercream.
Chocolate cupcakes work just as well and give the dessert a richer flavor. If you choose chocolate, add a little red frosting or red fondant around the mouth so the Audrey II design still stands out. Both cupcake bases work for this recipe, so use your favorite.
Ingredients
Cupcakes
- Red velvet cake mix
- Ingredients listed on the back of the cake mix box
- Cupcake liners
Buttercream Frosting
- Unsalted sweet cream butter
- Powdered sugar
- Heavy whipping cream
- Vanilla extract
- Green food coloring
Fondant Decorations
- Red fondant
- White fondant
- Powdered sugar, for rolling the fondant
Equipment
- Cupcake pan
- Electric mixer and mixing bowl
- 3-inch round cookie cutter
- Small round icing tip or cutter
- Cutting board
- Sharp knife
- Cooling rack
- Parchment paper
- Large piping bag with a star tip
- Large piping bag with a leaf tip
How to Make Little Shop of Horrors Cupcakes
Bake the Cupcakes
Preheat the oven according to the directions on the cake mix box.
Line the cupcake pan with cupcake liners.
Fill each liner about three-fourths full.
Bake the cupcakes according to the package directions.
Remove the cupcakes from the oven and let them cool in the pan for about 30 minutes.
Transfer the cupcakes to a cooling rack and let them cool completely before decorating.
The cupcakes must be completely cool before you add the frosting. Warm cupcakes can cause the buttercream to melt and make the fondant decorations slide.
Make the Green Buttercream
Add the butter, powdered sugar, heavy whipping cream, and vanilla extract to a stand mixer. Mix on medium speed until the frosting is smooth and well combined.
Add green food coloring a little at a time until the frosting reaches the shade you like. Audrey II is a plant, so a bright green frosting looks especially cute. A darker green also works if you want the cupcakes to look a little more spooky.
Make the Audrey II Fondant Faces
Sprinkle powdered sugar over the cutting board.
Roll the red fondant to about 1/8 inch thick.
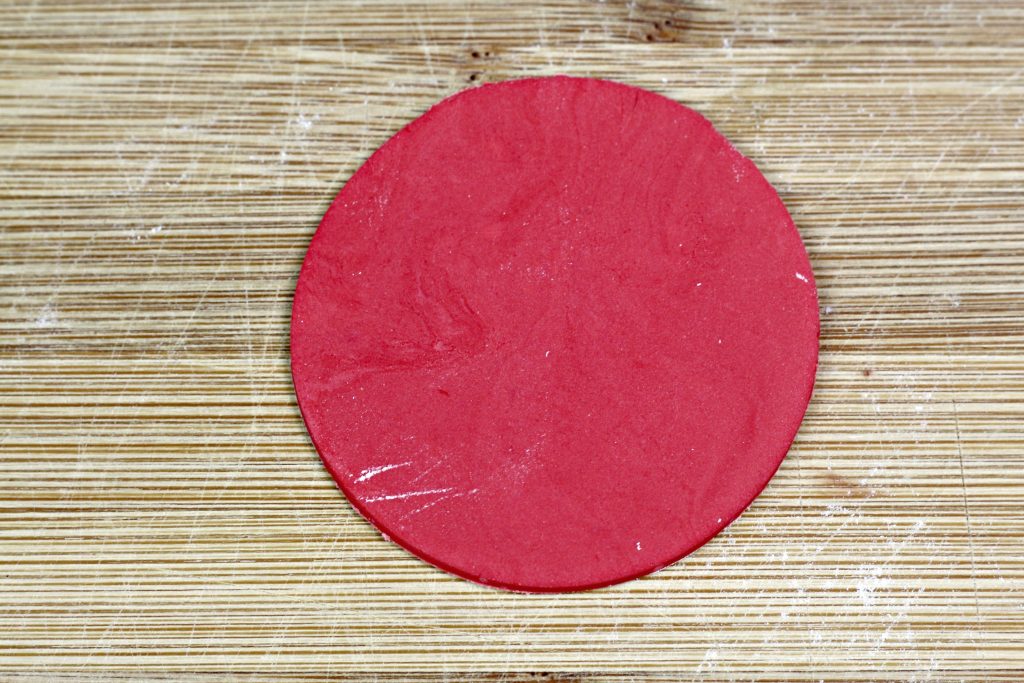
Use the 3-inch round cookie cutter to cut out 12 red circles.
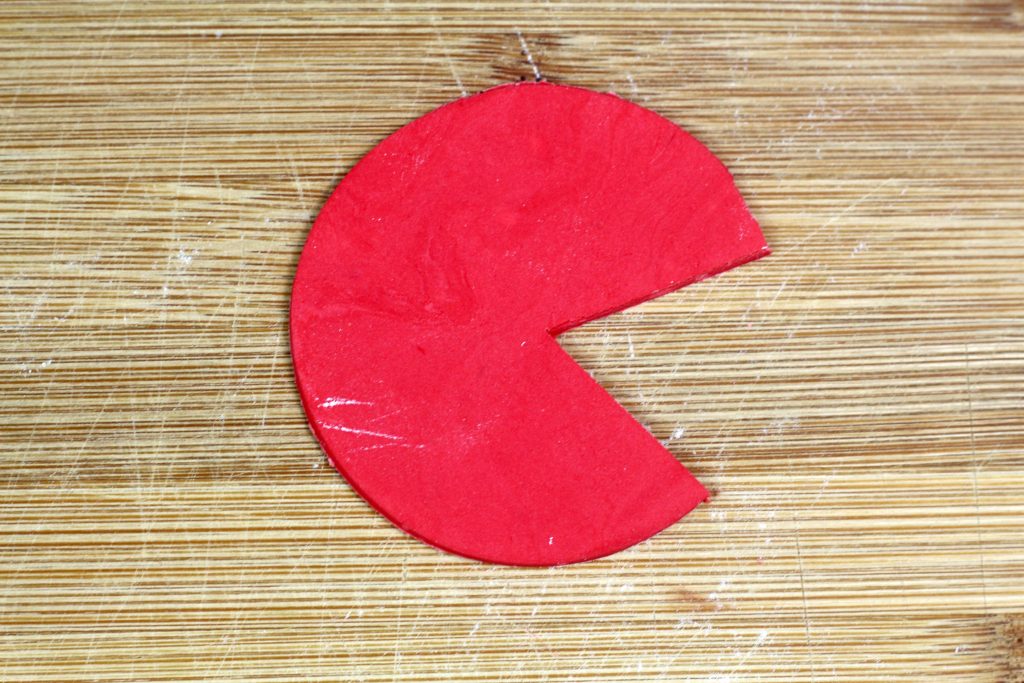
Cut a triangle into one side of each red circle to create the open mouth.
Place the red fondant circles on a parchment-lined cookie sheet.
Roll out the white fondant to about 1/8 inch thick.
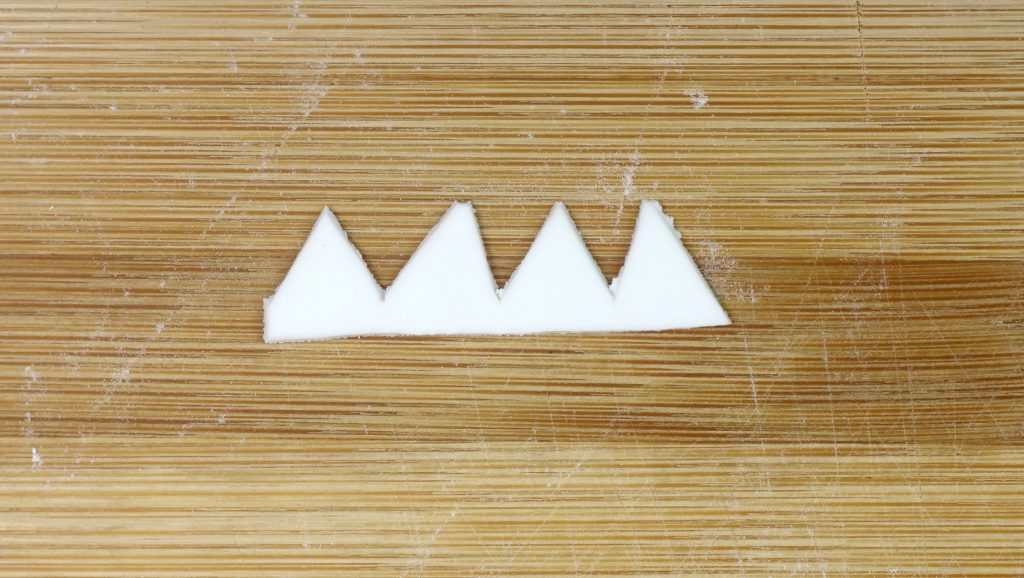
Cut thick strips from the white fondant.
Cut small triangles from the strips to make the teeth.
Use the small round icing tip or cutter to cut out small white circles for the spots.
Turn each red fondant circle over.
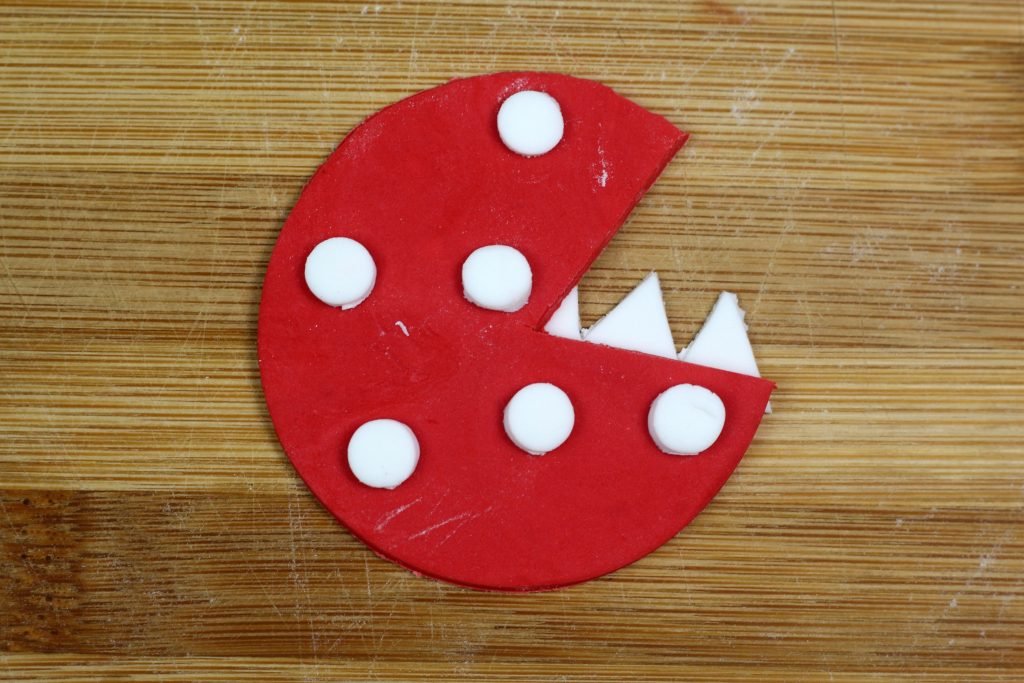
Dip your finger lightly in water and attach a strip of white fondant along the bottom edge of the mouth.
Let it sit for a few minutes before adding the top strip.
Trim away any extra white fondant.
Turn the decoration right side up.
Add a tiny drop of water to each white fondant spot, then place the spots randomly on the red fondant.
Allow the decorations to sit until they feel firm enough to handle.
Use only a small amount of water when attaching fondant. Too much water can make the fondant sticky or cause the colors to run.
Decorate the Cupcakes
- Spoon the green frosting into a piping bag fitted with a large star tip.
- Place about 1/4 cup of frosting into a second piping bag fitted with a leaf tip.
- Pipe a swirl of green frosting onto each cooled cupcake.
- Place one Audrey II fondant face in the center of the frosting.
- Use the leaf tip to pipe green leaves around the bottom of the fondant decoration.
- Repeat with the remaining cupcakes.
For more natural-looking plant leaves, hold the piping bag close to the cupcake, squeeze gently, then pull away while releasing pressure. Make some leaves short and some a little longer. They don’t need to be perfect, since Audrey II is supposed to look wild!
Fondant Tips
Fondant can dry out while you work with it, so keep any unused pieces covered in plastic wrap or inside a sealed bag. If the fondant feels stiff, knead it with clean hands for a few seconds.
If the red circles crack while rolling, knead the fondant again before trying another piece. If the fondant sticks to the cutting board, add a light dusting of powdered sugar. Don’t add too much, or the fondant can become dry.
You can also use ready-made Audrey II toppers or other pre-made fondant decorations if you want to save time. Wilton supplies are easy to find in many cake decorating sections, and red and white fondant are also available through Amazon or specialty baking stores.
Make-Ahead Instructions
The fondant faces can be prepared one day before the cupcakes. Store them flat in a cool, dry place with parchment paper between the layers. Don’t refrigerate the fondant decorations, because moisture can make them soft.
The cupcakes can also be baked one day ahead. Once they are completely cool, keep them in an airtight container at room temperature. Make the frosting and decorate the cupcakes the next day.
For a large Halloween party, bake several batches and keep the finished cupcakes in a cupcake carrier. If you need more than 24 cupcakes, make an additional batch instead of overfilling the liners.
Frosting Options
The vanilla buttercream in this recipe is easy to tint green and pipes well around the fondant decorations. Cream cheese frosting is another good option if you prefer a tangy flavor, but it should be refrigerated.
Chocolate buttercream can be used for a darker plant design. You can also pipe a little red frosting inside the mouth for a fun, messy look. Just make sure the frosting is thick enough to hold the Audrey II decoration.
Can I Make a Little Shop of Horrors Cake?
Yes! This design also works for a Little Shop of Horrors cake. Bake your favorite cake, cover it with green buttercream, and place several large fondant mouths on top. Pipe leaves around the decorations to create a plant-covered cake.
For a smaller cake, use fewer fondant circles and arrange them in a pattern around the top. A chocolate cake with red fruit filling would also make a fun variation for anyone who wants a richer version of these cupcakes.
Cupcakes or Cookies?
These cupcakes are better when you want a soft, frosted dessert that can be decorated with tall green leaves. Little Shop of Horrors cookies are easier to stack and package for party favors, but they have less room for the buttercream plant design.
You can use the same red mouth, white teeth, and green leaf idea for cookies, cupcakes, or a full-size cake. The design works well for all three!
How to Store Cupcakes
Keep the cupcakes covered in an airtight container or cupcake holder. Leaving them exposed to air will make them stale and dry.
A cupcake holder is helpful when the cupcakes have tall frosting and fondant decorations. It keeps the cupcakes protected and makes them easier to transport.
How Long Do These Cupcakes Last?
Properly covered cupcakes can last up to 5 days. They can be stored in the refrigerator, but the cake may dry out faster. Since this buttercream frosting doesn’t need to be refrigerated, room-temperature storage is usually best.
Enjoy these fun Little Shop of Horrors cupcakes at your next Halloween party!
Want more Halloween posts?
- Creepy Spaghetti with Deviled Eyes | Spooky Spaghetti for a Halloween Party
- Bloody Red Velvet Cocoa Halloween Treat
- Halloween Treats Kids Will Love
- Creamsicle Cookies n Cream Ice Cream
- Halloween Treat Bag Idea Craft
- Easy Halloween Pumpkin Cup Craft
- Slime for Halloween
- Pompom Ghost| Halloween Ghost Craft
- Googly Eye Vase for Halloween
- DIY Mummy Halloween Door Decorations
- Festive and Scary Halloween Decorations
- Vampire Drink Halloween Cocktail
- Creepy and Delicious Halloween Cocktails
- Smiley Face Halloween Makeup
- Creative Fun DIY Halloween Costumes
- Audrey Little Shop of Horrors Cupcakes
- Halloween Dirt Pudding Cups
Audrey Little Shop of Horror Cupcakes
Equipment
- Electric mixer/bowl
- Cupcakes liners
- Cupcake pan
- 1 large piping bag with star tip
- 1 large piping page with large leaf tip
- 1 3 inch round cookie cutter
- 1 1 inch round icing tip for the spots
- 1 cutting board
- 1 sharp knife
Ingredients
Chocolate cupcakes Ingredients:
- 1 box red velvet cake mix
- Ingredients as listed on the back of the cake box.
Frosting ingredients
- 3 C unsalted sweet cream butter softened
- 6 C powdered sugar
- 5-7 tbsp. heavy whipping cream
- 2 tsp. vanilla extract
- Green food coloring
Decorating ingredients
- 1 package of red fondant
- 1 package of white fondant
- 1/2 C powder sugar
Directions
Cupcake Directions
- Preheat oven as per directions on the back of the box.
- Line the cupcake pan with cupcake liners
- Fill in each of the cupcake liners 3/4 of the way
- Place in oven.
- Bake following the directions on the back of the box
- When the cupcakes have have baked remove them from the oven. Set aside for at least 30 minutes to cool.
- Remove the cupcakes from the pan
- Transfer them to a cooling rack.
- Allow to cool completely..
Frosting Directions
- Using a standing mixer combine the butter, powdered sugar, heavy whipping cream, vanilla, and mix on medium speed until combined and smooth
Decorating Direction
- Sprinkle the powder sugar onto the cutting board
- Roll out your red fondant to 1/8 inch thickness
- Use the 3 inch round cookie cutter and cut out 12 red circles
- Using the knife, cut out a triangle on one side for the mouth
- Place onto a cookie sheet fitted with parchment paper
- Roll out the white fondant to 1/8 thickness
- Using the knife again cut out 12 thick strips
- Cut small triangles out of the strips to make it look like teeth
- Using the smallest cookie cutter you, poke out little circle
- Flip the red circle over
- Dip your finger in water a place one strip on the bottom of the “Mouth”
- Allow to sit for a few minutes before doing the top
- Cut off excess pieces of of the white fondant
- Flip back over
- Lightly dip your finger into water and drop some water onto the little fondant dot
- Place the circles randomly throughout the red.
- Scoop the green frosting into the piping bag with the round star tip
- Scoop about 1/4 C of frosting into the one with the leaf tip
- Frost cooled cupcakes with the round tip
- Place the house of horror fondant piece in the middle of the frosting
- Using the leaf tip, pipe somea leafs onto the bottom of the art piece
- Repeat steps with remaining cupcakes
- Enjoy!

Leave a Reply